Skill Level:
Crafting Time:
Technique(s):
Material(s):
Category:
Tag(s):
Share This Craft
Search Crafts
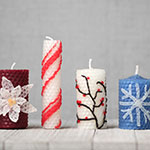
Wintery Candle Holders

Transform ordinary jars or glassware into festive decorations and tableware with just a few colors of paint and stencils. In this article we’ll give you a some ideas on how to decorate candle holders and jars so you can use them as luminaries, but you could even decorate a gift in a jar using these same techniques. If you are looking for inexpensive glassware, the dollar store always has several different types of glassware suitable for candles and other gifts.
Supplies & Tools:

- Glass jar or candle holder
- Glass paint
- Stencils
- Pouncers
- Tape
- Glass gems
Frosty Wonderland
We used Martha Stewart Glass Paint in pearl white, pearl aqua, and glitter aqua.
First, use a foam pouncer to apply the white paint, then add snowflakes.

After the white paint dries, add pearl aqua snowflakes. When it is completely dry, finish it off with a ribbon to cover the lip (if using a jar), drop a candle inside, add glass gems around the candle, and you’re done.


Simply Snowflakes
Use a stencil to add snowflakes to a votive holder.

Classic Dots
Martha Stewart Glass Paints come with a fine tip applicator so it’s easy to add small details. Add dots around the rim of a votive holder. Once paint is dry, place candle inside and fill with glass gems.

You can easily change the colored glass gems for any occasion.

Idea from the Elves:
- Fill with whole coffee beans for an aromatic gift!
So Sparkly
Apply several layers of glitter paint, creating a gradient. (Allow to dry between coats.) After glitter paint is dry, follow the manufacturer’s instructions and stencil designs on top of the glitter. Be sure to wait for the glitter paint to completely dry! If you are impatient and try to add a second design before the paint is completely dry, the glitter paint may peel off as you lift the stencil.

Add glass gems around the votive candle and tie a ribbon around the lip.

Elfy Hints:
- When working with stencils, be sure to only apply paint in an up and down motion. Do not drag the pouncer (or brush) or paint will bleed under the stencil and your design will be smudged. If your design still looks blurred or smudged, you might have too much paint on the pouncer.
- Check the drying instructions on your paint. This paint (Martha Stewart Glass Paints) required 21 days to air cure, or you can bake it to expedite the cure time. HOWEVER, glitter paint cannot be baked! To cure in the oven, place dried project in the oven and set temperature to 350° Fahrenheit. Allow oven to heat and after 30 minutes turn the oven off. Allow the project to cool in the oven. *Do not place project in a hot oven! The glass must gradually heat up and cool down in the oven.