Skill Level:
Crafting Time:
Technique(s):
Material(s):
Category:
Share This Craft
Search Crafts
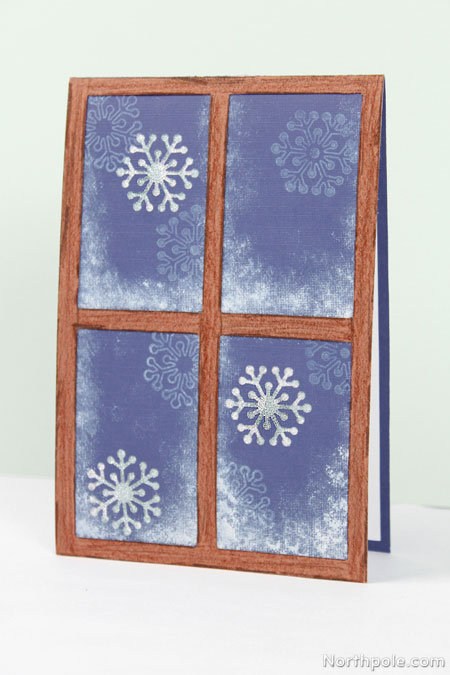
Winter Window Card

It is fun to discover new craft supplies, isn’t it? We found a nifty material at the craft store—ink daubers! They come in many colors and are great for lots of things, such as stamping, creating a textured edge, or adding a distressed look to paper. We used a white ink dauber to create the snow within the window frame and the stamped snowflakes. And, of course, what’s a Christmas card without some glitter? The cutouts reveal the sparkly paper underneath, and the snowflakes twinkle when the light is just right.
Supplies & Tools:

- Printable template (download here)
- Blue cardstock
- Silver glitter paper
- Brown construction paper
- X-Acto
- Cutting mat
- Tape runner
- Scissors
- Ruler
- Pencil
- Bone folder
- Artist tape
- Snowflake punch and stamp (such as Martha Stewart’s Polar Snowflake Punch and Stamp Set)
- White ink dauber
- Colored pencils and/or crayons
Directions:
- Measure and cut blue cardstock to make a card that is 4" x 6".
Note: We like to use a bone folder to score and burnish the fold in order to make it nice and crisp. - Print the template and cut out the window. Cut out each of the shaded rectangles and discard.
- Trace the window frame onto brown paper. (Either construction paper or cardstock will work here.) Set template piece aside.
- Cut out the window frame using X-Acto and metal ruler.
- Place window frame on a scrap piece of paper. Color the frame with brown colored pencils and/or crayons. (Use both to give it more color and texture.) Take a dark brown colored pencil and draw a line along the edges of the paper, as this will make the window frame look more three-dimensional.
- Place window frame on card and lightly trace the windows with pencil. Remove window frame and set aside.
- Take white dauber and lightly dab around the “windows.” Focus more on the bottom of each section to make it look like the snow has settled on the windowpane. The white ink fades a little once it is dry, so you can add more ink in layers to build up the snow. Just be sure not to apply too much ink at one time; that will make the snow look splotchy.
- Dab some ink onto the snowflake stamp and stamp around the card. Set ink and stamps aside.
- Take snowflake punch and punch 3 snowflakes around the card. Set punch aside.
- Glue the window frame to the card with the tape runner.

- Measure and cut a 4" x 6" piece of glitter paper. Attach the glitter paper to the back of the front flap using the tape runner. See how the glitter paper makes the punched snowflakes look sparkly?

- Cut a 3.75" x 5.75" piece of white cardstock and glue inside the card. Write a message on the inside and your card is finished.
Elfy Hint:
- This card will fit in an A4 envelope, and you can find A4 envelopes like these at envelopes.com.